”home””about””blog””shop”
Showing posts with label how to. Show all posts

Thursday, March 21, 2013

DIY GROCERY BAG EASTER BASKET

DIY easter basket
PHOTO CREDIT THE ELLI BLOG

You wouldn't know it from the 15 degrees F temp that I awoke to this morning, but Spring has officially sprung.  I'm starting to think of all the fun paper projects that are ahead and ran across something I just had to share.  

Ellinee.com put together this wonderful tutorial that turns an everyday brown paper grocery bag into an cute Easter Basket.  Wouldn't these be lovely incorporated into your Easter Brunch table setting?

Check out the full DIY here.  Happy Spring!


Tuesday, March 19, 2013

A NEW TWIST TO OVERCOME YOUR FEAR OF PUBLIC SPEAKING


I've said it before and I'm sure I'll say it again many times after this, but I heart me some Marie Forleo. Marie's Q&A Tuesdays are always chock full of awesome tips and today's is no different.  

Check it out below for a new twist on how to "overcome" your fear of public speaking (and anything else for that matter. Enjoy!

Thursday, March 14, 2013

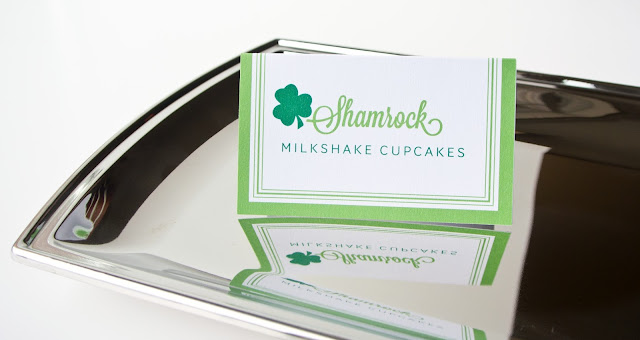
ST. PATRICK'S DAY PRINTABLES


The fun continues today!  Remember the picture I shared on Tuesday?  Well, that my friends was a visual representation of all the treats that help make St. Patrick's day a blast to celebrate.


Soda Bread, Shamrock Cupcakes, Thin Mint Cookies and even a tasty Lime - Ginger Float.  YUM!

Let me make this clear, I will not be baking anything.  I plan on trying to convince others to do so as I'm useless in the kitchen.  On the other hand, playing barkeep and whipping up those floats is right up my alley.

In case you are not as adverse to the oven as I, I wanted to share all the fun recipes for each of these tasty items. Please let me know if you try to make any of them!

While cooking/baking was not on my to do list, pulling together fun party printables definitely was!  Just like a Boy Scott, I wanted to be prepared to showcase the skills of others with some cute food tents.  I also wanted to make a fun door sign to set the mood for the celebration.

Both the door sign and blank food tents can be downloaded below.  If  you use them, I'd love to see!

We're off to Savannah tomorrow so have a happy & safe St. Patrick's  Day all!  Don't forget to wear your green.


After all your fun treats are prepared - hang the sign on your door to welcome everyone to your party!


Thursday, January 31, 2013

HOW TO COMBINE MULTIPLE PICTURES IN ONE JPG FILE


As I mentioned yesterday, I was trying to figure out a way to quickly update my existing .com site using the tools that I had at my disposal.  In a series of short sited decisions, I chose to set the site up using wordpress.com instead of wordpress.org and as a result, my options were a little limited.  My first priority was to create some sort of slider to showcase several of my designs to display at the top of my site. I didn't have a slider plug in at my disposal, so I had to find a creative way to utilize the header instead.

In trying to solve my dilemma, I remembered a little Photoshop tutorial I ran across that helped me create the below for my Memphis City Guide post (found here).  


Now, I realize this baby is a little all over that place.  So if I used these same tools, I'd have to be much more purposeful in my design.  As Jess Lively would say, I would have to implement my design with intention.

I realized there would need to be a common theme to unite all the pictures so I came up with the idea of the category badge (custom personal stationery, birthday party invites, etc.)  This badge and a common picture height and width setting was all I needed to get started editing and creating my photo files.

Once I had all my photo files prepared, I went back to review Liz's (from Say Yes to Hoboken) wonderful tutorial - found here and I was off to the races. I'm super pleased with how it turned out, if I do say so myself.

Happy photo editing everyone!


Tuesday, January 22, 2013

MARDI GRAS WREATH PROJECT


Happy Tuesday!  I've finally recovered for my cold and I'm back to my old self again.  That said, it is going to top out at 2 degrees in Chicago today, so my cold fighting abilities may be put to the test!

I took advantage of the long weekend and finished a project that Mr. Squareview has been begging me to do for over a year.  I custom ordered these beautiful pomanders for our wedding aisle decor and have been struggling to find a second life for them for the last 18 months. Mr. Squareview loves to organize (it boarders on obsession, really).  Half of that organization typically results in a major purge every few months so the fact that these "purple balls" have been taking up valuable storage space has been a point of discussion.  To prevent them being a causality of the purge, I had to find a new use for them so they wouldn't getting tossed.

You may have noticed in my previous posts (here, here and here) that I like me some wreath making, but a plain purple ball wreath just didn't float my crafty boat.  Exactly what would my poor door be celebrating?  So I brainstormed on purple and then it hit me - Mardi Gras! It's super early this year (Feb 12th) so it is definitely the right time to begin celebrating!


It's not my best work to date, but I think it turned out cute enough and I got to rescue some of my pomanders from the trash heap.   Happy Mardi Gras, Y'all!


Friday, December 21, 2012

FREEBIE FRIDAY - HOLIDAY GIFT TAGS

Happy Friday!

Week three is here and it is time for more printable gift tags!  This week I have some fun tags whose colors were inspired by some gorgeous sea glass I ran across while in Puerto Rico.


Have a wonderful weekend!


Wednesday, December 19, 2012

DIY PAPER SNOWFLAKE


Making a DIY snowflake is easy, describing how to make it is hard!  I'm admitting defeat and choosing to defer to the master, Lia Griffth of Elli.  In addition to her gorgeous work in paper fashion and her fabulous Stationery Shop, she writes a great blog full of inspirational paper items.

Check out the blog called Ellinee Journal here.

Paper Snowflake Template
IMAGE VIA ELLINEE.COM

Lia vastly improved the template I was originally using and put together a fantastic step by step to boot.  Instead of trying to reinvent the wheel for this edition of Do It Yourself December, I'll point you over to Lia's site instead.  You can find both the DIY step by step and the Snowflake Template here.  

I had a blast putting together my snowflakes and I hope you do too!  Happy Wednesday!


Wednesday, November 14, 2012

ADDING 'YOU MIGHT ALSO LIKE' BUTTONS TO YOUR BLOG

You've seen them everywhere - the suggestions at the bottom of the blog post saying that there are other post on this site that you might also like. I don't know how the little bot does it, but it is generally true - I DO also like!

I've been wondering how I would go about adding those helpful little hits here too, but my laziness prevailed and I never got around to researching.  My obsessive thorough blog reading saves the day again!  In fact, it was a link found on AltSummit's blog which led me to a couple year old Creature Comfort post that gave me the answer.  Unfotunately, I can't link back to the exact post as I'm not entirely sure how I found it.  Rats.

While I can't give as much link love as I'd like and simply send you right to EZ's post, I can tell you what it said.

ADDING "YOU MIGHT ALSO LIKE" TO THE BOTTOM OF YOUR POST

It took me all of 23 seconds to complete this task, so no need to hunker down to prepare for a lengthy how-to.  Follow a couple links and viola! You're done.

STEP ONE::

  • Go to the site LinkWithin here
  • Fill out the highlighted section with your blog's general stats & click 'get widget'


STEP TWO::
  • Click the Install Widget link below.

STEP THREE::

  • This will bring up the Add Page Element info box shown below.  You click Add Widget and you're done.  If you use Blogger like me, you can then drag the new widget from the column where it is added by default and instead put it under your post if you'd like.   


Check out my new suggestions below.  Like I said, I don't know how the little bot does it, but I sure do like his style.